
The Fintech Portal is an application that assists retailers in processing invoices more efficiently. You can manage your regulated and non-regulated invoices, payments, bank accounts, and vendor relationships through your account.
Fintech Portal Registration
You can either create an account for the Fintech Portal via the registration site, or by accepting an email invitation from a participating vendor.
Before registering, have the following information ready:
- Building/Location name (ex: Corporation: Publix, Location: Publix Liquors Store).
- Location address.
- Location ID, if your company uses this. (If you do not have a location ID, you can use the default ID provided).
- Liquor license. This is an optional field.
- Business type (bar, restaurant, etc.).
⚠️ Ensure that your location hasn’t already been registered. The portal allows users to create an account if a unique email address is used regardless of if the location has already been registered. If a duplicate account is created, the email used for the most recently registered account email will be contacted by Fintech.
Creating an Account
To begin:
- Either access the registration page and click Get Started, or open your email invitation, click Accept Invitation, then Get Started for Free:


- Enter info about yourself (email address, name, phone number and your role) under Contact Info. Remember that your email address will be used when you log in.
💡 If you are not sure of your role (or you wear many hats), just pick the one that's closest to how you describe yourself. Role does not affect your registration or access within the portal.
- Hit Continue to move to the next step. If the Continue button is not clickable, double check that information entered in the email and phone number fields is correctly entered.
💡Did you hit Continue but need to make a change? Just click on the step and update your information. For example, you can change your email address yourself during registration by clicking Contact Info. After you register, Client Services will need to help you change your email address.

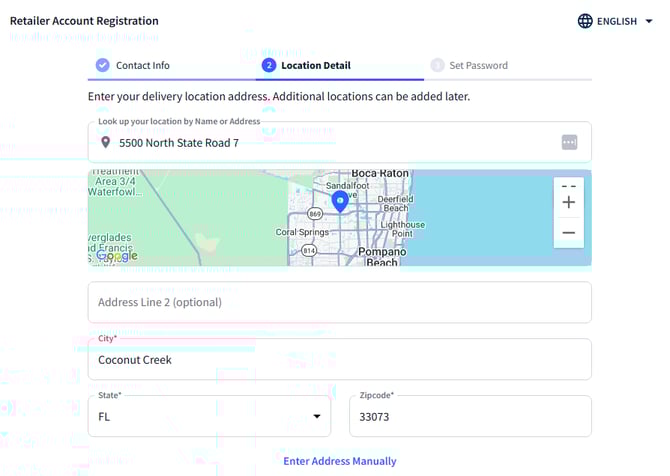
- Enter the location name or address into the address field, then review the populated location information.
⚠️ If you cannot find your location using the GPS search, click Enter Address Manually to type the location information:
-
Review your business details for accuracy:
-
If the location name does not populate, confirm it is exactly as it appears on your liquor license.

-
This is the "dba" of your location used by vendors & distributors to find you. You will add your LLC or business name later.
-
Pick the category most similar to your business type. For example, if you own a gas station you would choose "C-Store" (short for "convenience store." The choice will not affect your subscription. It is just for our internal use to categorize your business.
-
Add a Liquor License number for your team's reference. It will appear in Company Profile.
-
Do you manage more than one location? If so, check the box. You will have the opportunity add a Location ID. If you don't use location IDs, just use the default provided (000001). Location IDs must be six digits long. The system will add zeros in front to meet this requirement.
-
-
Next, enter the password you want to use for the account, agree to the Terms and Conditions, then click Create Account.
⚠️ Received an Account Already Exists message? The email you are trying to use is already registered to another account within the portal. Confirm the location has not been registered already by someone in your company.
It's possible that your account needs to be reactivated, if it had been registered sometime in the past. To reactivate your account or get help with your locations, contact Client Services at support@fintech.com.
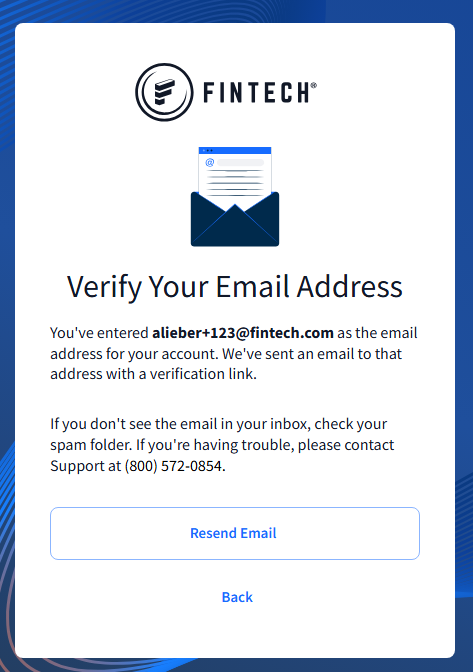
Once verified, you can access the Fintech Portal and begin the account setup process. Read on to learn about adding vendor relationships and payment methods.
Account Setup
Adding Vendors
To add the vendors that serve your location:
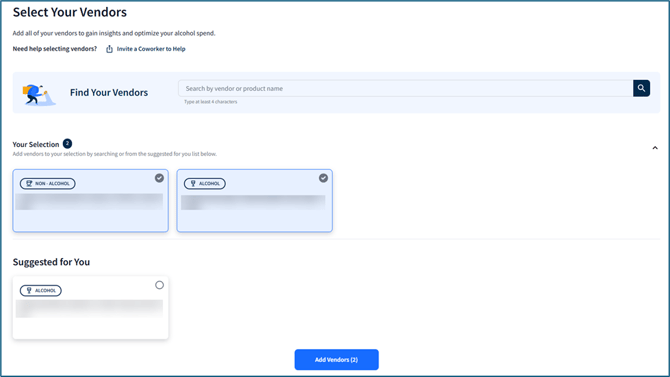
- Click Select Your Vendors:

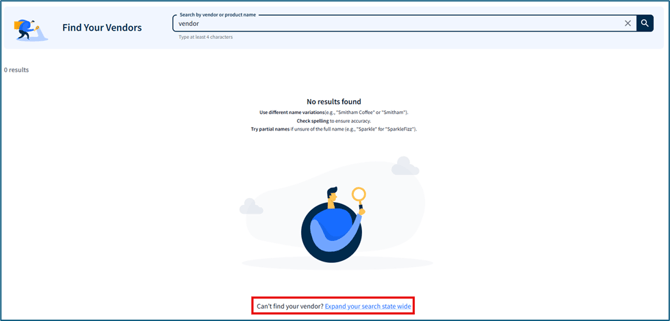
- Choose vendors from the list provided and/or search for additional alcoholic or non-alcoholic vendors using the search bar. Click Add Vendors when you have completed your selection (you can still add more after finishing account setup):
💡 Not seeing a vendor after using the search bar? Click Expand Search Statewide. If you still aren't seeing them, you may have to request that it be added to Fintech’s registered vendors list before being able to finish account setup: How can I add a vendor to Fintech's participating vendors list?
- The Select Your Vendors task should now be completed:

Adding Payment Methods
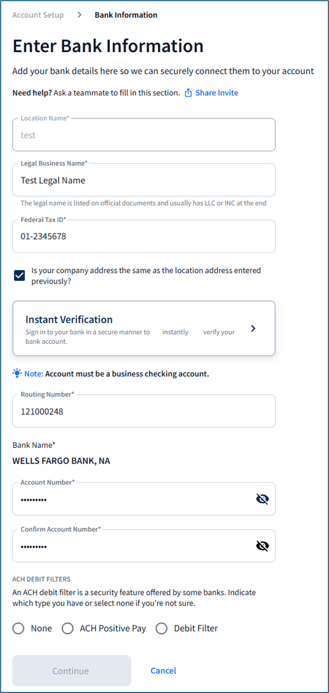
You must add a payment method to your account before you begin receiving invoices from your vendors. Before you begin, have the following information:
- Legal business name (name of corporation - ex: Corporation: Publix, Location: Publix Liquors Store).
- Federal Tax ID (Origination ID).
- Routing and Account numbers.
- Whether your bank account uses a block or filter.
⚠️ Know whether your bank account uses block or filter security measures! A debit block only allows transactions from specific vendors, while an ACH filter requires your approval for transactions to be processed. Contact your bank if you are unsure before connecting a bank account.
To add a payment method:
- Click Connect Your Bank:
- When setting up a bank account, the location’s name will pre-populate and cannot be edited. Add a Legal Business Name, Federal Tax ID, and choose whether the company address is the same as the location. Clicking Instant Verification to pre-populate banking information by logging into your bank account during registration or manually enter banking details. Click Continue once satisfied.
⚠️ If you do not know whether your bank uses blocks or filters, contact them! Making the wrong choice between ACH Positive Pay or Debit Filter can result in a bank return.
- Scroll through the banking terms of service, enter information to provide an e-signature, then click Agree and Sign:
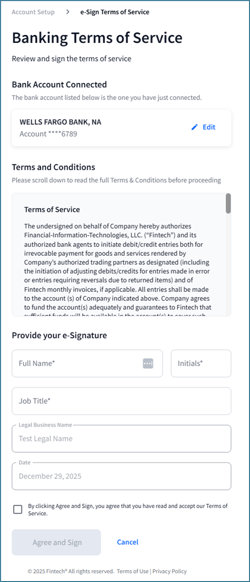
This will complete your account setup, and you can now start making vendor payments through the Fintech Portal!
⚠️ If you receive an error message when creating your account, please wait for Customer Support to reach out to fix the issue:

Profiles and Customer IDs
Your profile icon will be displayed on all pages in the top right-hand corner. All Fintech accounts are assigned with a unique number called the Fintech Customer Number, or FTS ID. Have this available when emailing or calling Client Services for portal assistance:

Depending on your user role, you can make certain changes to the Profile section, including your name, job title, phone number, and password. Learn more about the Add New Company feature here.
Adding Another Account
Have another company you need to register? Once you are set up with your first account, you can add another from the portal. The account will be registered under your email. To add, click on Add New Company from your user information on the upper right corner with your initials.
The portal will check whether you actually need a new account or just a location. Generally, if you use the same federal tax ID number, you do not need a new company. If you do use the same ID number for more than one company, you'll be asked if the second company uses the same bank account.
If you answer yes to using the same ID and bank account, you probably need to register a new location and not a new company.
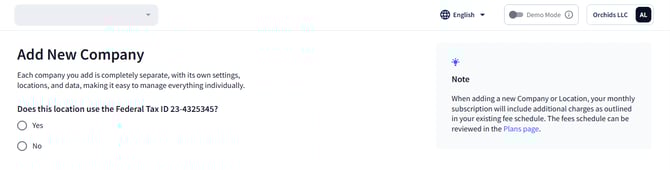
When adding a new company or location, your monthly subscription will include additional charges as outlined in your existing fee schedule. The fees schedule can be reviewed in the Plans page.