
Scheduling Payment for Non-Regulated Invoices
User Uploaded Non-Regulated Invoices
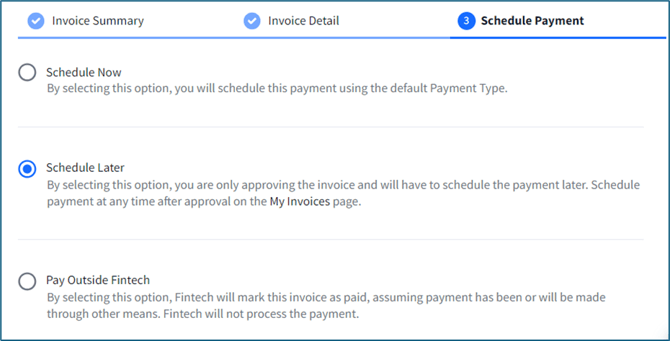
If you are subscribed to a Premium or Premium Plus plan and uploaded a non-regulated invoice in Manage Invoices, you can choose to schedule a payment date at a later time during the invoice approval process (Uploading Non-Regulated Invoices).
💡 Want to schedule payments immediately? Click here: How do I schedule payments as soon as I approve an invoice?
After you've chosen Schedule Later:
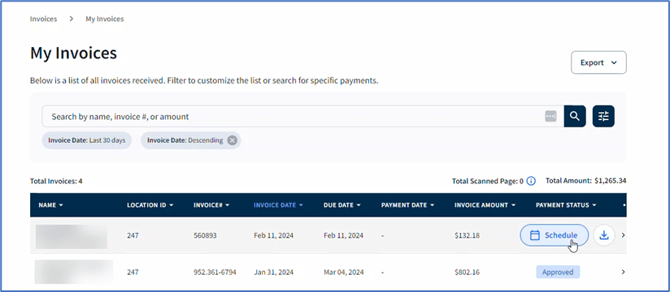
- Go to Invoices > My Invoices.
- Search by name, invoice number, or amount within the search bar or filter the table by several parameters, such as Status, Invoice Date, Time Period, Vendor, Approved By, etc.
- You can schedule a payment in several ways:
- Under the Payment Status column, roll over the Approved status and click. This will open up a form to let you complete your scheduling. This is the quickest way to schedule if you do not need to review the invoice again:
- Alternatively, click on an invoice row, then click on Schedule Payment. You will be able to view the invoice details before scheduling:

- Under the Payment Status column, roll over the Approved status and click. This will open up a form to let you complete your scheduling. This is the quickest way to schedule if you do not need to review the invoice again:
💡 Learn more about payment preferences here: What options do I have to pay non-regulated invoices?
Dates may not be available to schedule due to holidays, weekends, or your bank's funding schedule.
Non-Regulated Vendor-Submitted Invoices
If a vendor submitted a non-regulated invoice and you pay them by check or outside of Fintech (Non-EFT relationship), and you are subscribed to a Premium Plus plan, you can edit the invoice's payment date in My Invoices.
Follow the steps above in User-Uploaded Non-Regulated Invoices, beginning with step 1.
⚠️ If a scheduled payment for a non-regulated vendor fails, Admin users will receive a notification in their email. Learn more about user roles here: User Management.
Canceling Scheduled Payments
To cancel a scheduled payment:
- Go to Invoices > My Invoices.
- Click on the invoice, click Edit, and cancel the payment on the pop up. You can only cancel a payment when it is still in Scheduled status. Once it starts to fund, you will not be able to cancel.
