
To add a vendor relationship:
- Go to Vendors > Add New Vendor.
- Either:
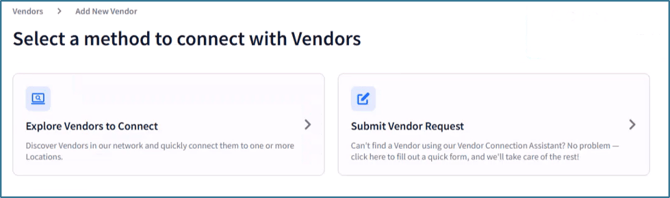
- Select Explore Vendors to Connect to search for vendors already participating in the Fintech network.
- Select Submit Vendor Request if you need to invite the vendor to join the Fintech network.
-
After selecting Explore Vendors to Connect, choose a state from the dropdown if you have locations in multiple states. If you do not, you can begin searching for and selecting location(s):
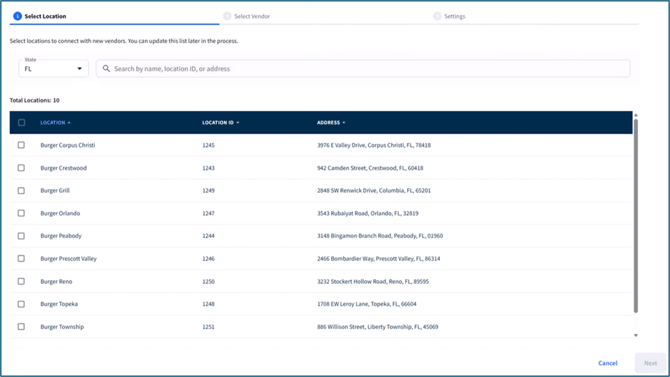
⚠️ If you do not see a desired location, it may need to be registered first. See: How Do I Add a New Location?
⚠️ If more than one business operates from the same address, the vendor relationship must be added separately for each location.
-
Click Next once required locations have been selected.
-
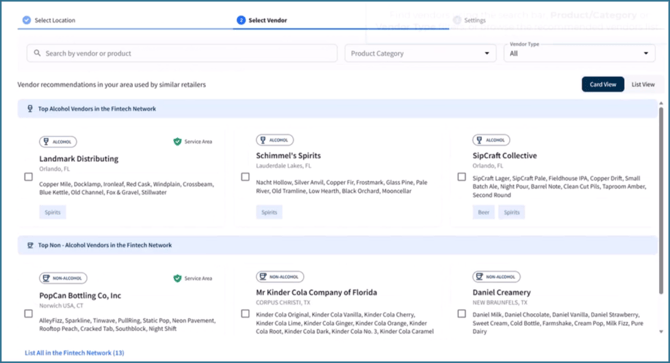
Find and add one or more vendors by:
-
Searching the vendor's name.
-
Filtering by Product/Category.
-
Filtering by Vendor Type.
-
Browsing the recommended vendors list.
💡 If you don't see the vendor after searching, select List All in the Fintech Network to expand the vendor list.
If the vendor still doesn't appear, you will need to submit a request for them to be added to Fintech's participating vendors list. Click here for more information: How can I add a vendor to Fintech's participating vendors list? -
- Once your selections are complete, click Next.
-
Complete a final review of the selected vendors, associated locations, and payment methods assigned to the relationship(s). From here, you can also remove locations or vendors, and add Vendor ID's if your back-office system requires them:
💡 How a vendor is paid depends on your subscription and the vendor's payment options. Some vendors require Automatic Payments, while others support Flexible Payments. Learn the differences: Paying Invoices
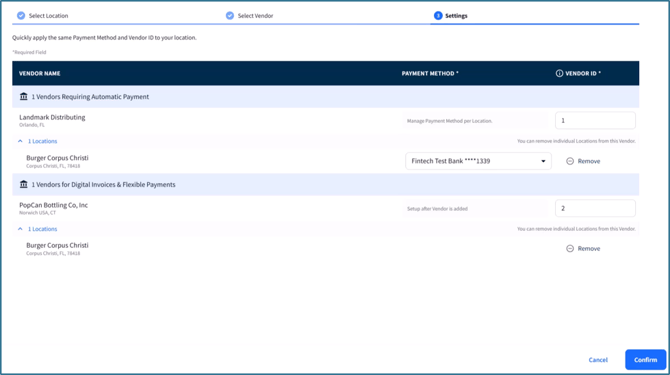
- Once satisfied, click Confirm to submit the relationship request.
After submitting a request, Fintech recommends following up with the vendor to ensure they have received and processed the request. To further monitor setup progress, view relationship statuses in Vendors > My Vendors > Relationship List View:
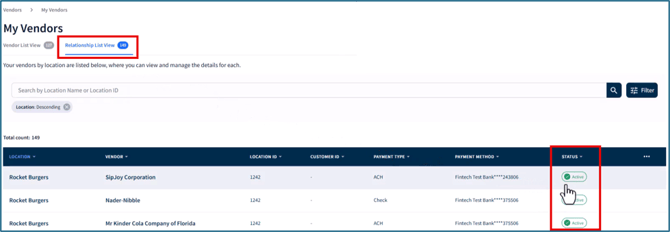
If the vendor approves the request, you will be sent an email and a notification within the portal that confirms the relationship is Active. You'll also need to complete a final approval of the setup in Tasks.
💡 Learn how to monitor your vendors and distributor relationships: Managing my vendors & distributors.
If a vendor or distributor declines a relationship request, you will receive an email notification with vendor contact details. For any questions or concerns, contact the vendor directly. You cannot re-send an invitation if a vendor has declined a relationship request.