
We are improving how information will be displayed throughout the Fintech Portal. Tables are now information-rich grids with advanced filtering, sorting, and viewing options.
This article provides an overview of these improvements and the areas of the portal they will affect, including:
-
Invoices
-
Locations
-
Vendors
-
My Products
- Settings
You can still search for or filter the grids using common filters for each page, such as vendor name, invoice number, payment amount, product name, etc. Also, depending on your subscription, you can still export the invoice summary or details.
What's New
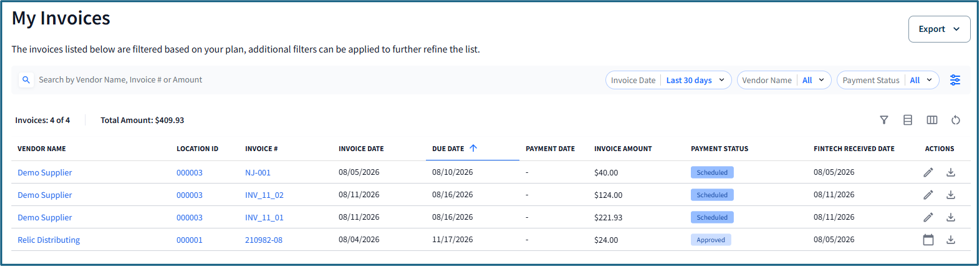
Information is now displayed in a grid format, with the commonly used grid filters at the top of the page. Here is an example of My Invoices:

Clicking the grid filter icon  lets you apply additional filters across the entire grid. The available filters will be dependent on the page you are on and your subscription level. Using My Invoices as an example, Premium Plus subscribers can filter by vendor type (Alcohol or Non-Alcohol) and payment type (ACH, Check):
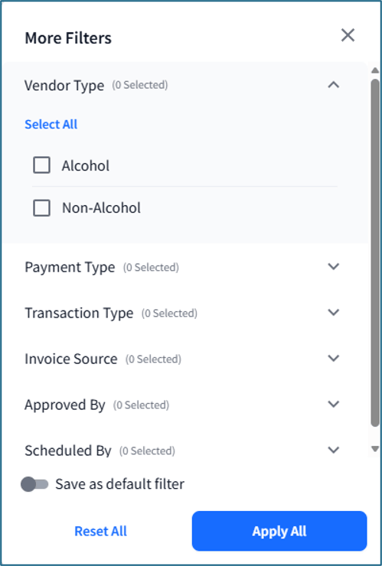
To save the selections as your default view, toggle Save as default filter, then click Apply All. To clear these selections, click Reset All.
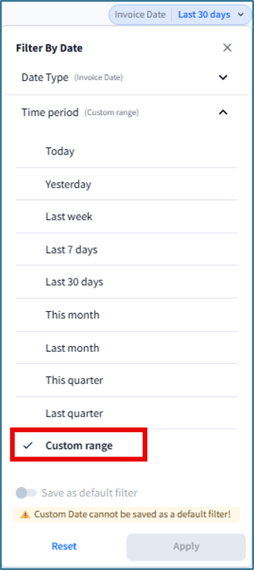
⚠️ The Custom Range option within the Invoice Date filter cannot be saved as a default filter:
Column Filters
The next level of options narrows down information within the columns and manages how the grid looks.
The column filter icon  lets you filter by a value within the grid. In the example below, the grid is filtered by vendor name and location ID. The "operator" determines how specific you wish to be.
For example, let's say the vendor supplies 100 locations and you want to find a specific invoice for a specific location from that vendor. You can filter the grid using the vendor name and location ID columns: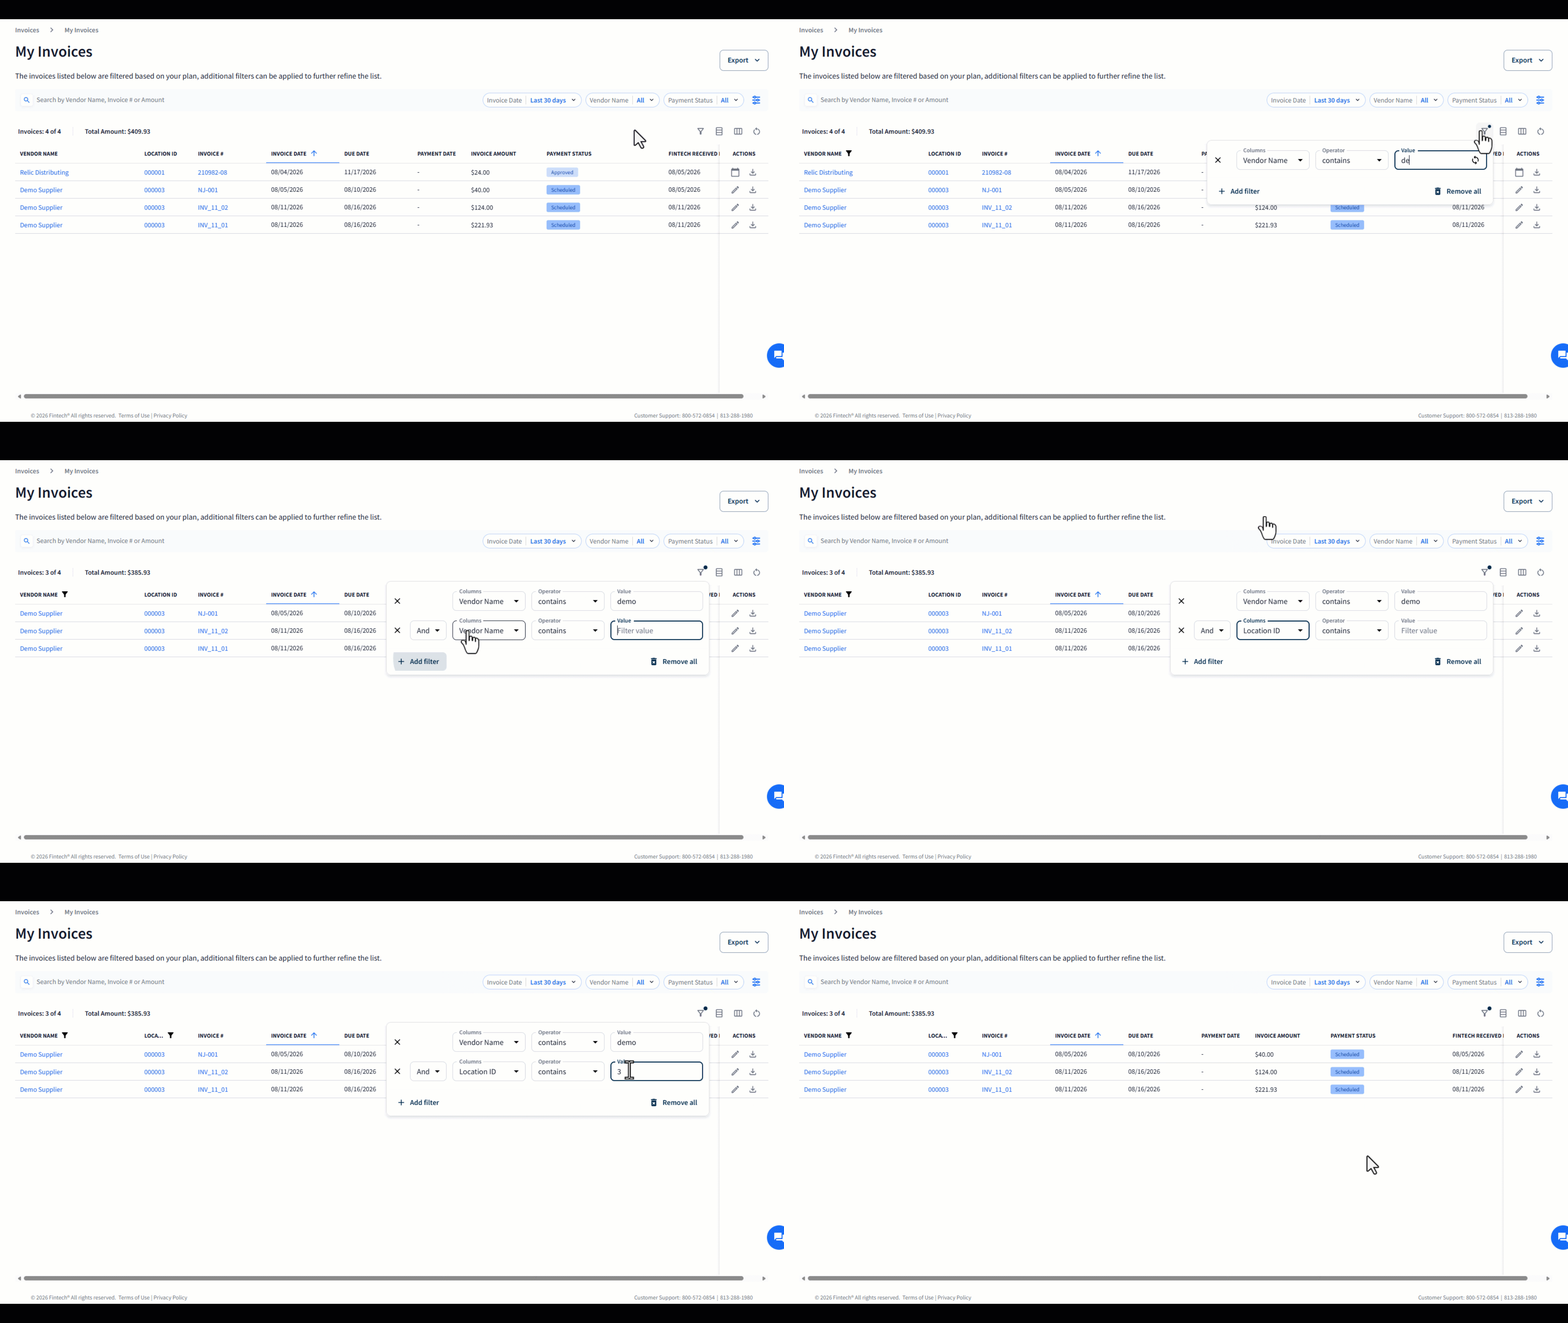
If you remember only part of the vendor name, you can choose "contains" as an operator to narrow down the list somewhat. In the above example, the user remembers "demo" as part of the name and then further narrowed the results with the location ID.
A small dot will appear on the column filter icon  when you have column filters applied.
To clear column filters, select the column filter icon , then click Remove All.
⚠️ If column sorting (Ascending or Descending) is an option in the grid, clearing filters does not reset which column the grid has been sorted by.
Adjusting the Grid Layout
Customize the grid to display and organize information in a way that works best for you. You can:
- Add or remove columns
 to expand or reduce the dataset. Note that columns required for searching cannot be removed from the table.
 -
Adjust row height
 for easier viewing:
- Compact - Condenses row height to display more records on the screen at one time.
- Standard - The default size of rows, which adds some padding in between.
- Comfortable - Adds more padding between rows to make the data easier to read.
- Pin columns in a certain order. For example, to move the Location ID column to the far left of the grid, hover over the column header, click the ellipses
 , then select Pin to left: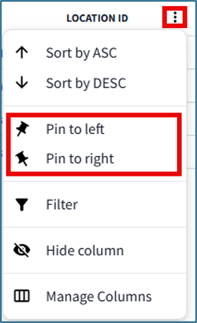
- Sort column data in ascending or descending order. For example, to quickly find vendors whose names appear near the end of the alphabet, hover over Vendor Name, click the ellipses, then select Sort by DESC.
Resetting the Grid Layout
If you want to return to the default column layout, select the Reset icon  above the grid.
⚠️ If column sorting (Ascending or Descending) is an option in the grid, clearing filters does not reset which column the grid has been sorted by.
Selecting Data in the Grid
On many grids, you'll find it easier to access key screens with hyperlinks. For example, in My Invoices, clicking on a vendor name or location ID in the grid opens the vendor or location profile:
If you want to open multiple invoices at the same time, select the hyperlink in the Invoice # column rather than selecting the row. This will open the invoice as a new tab in your browser: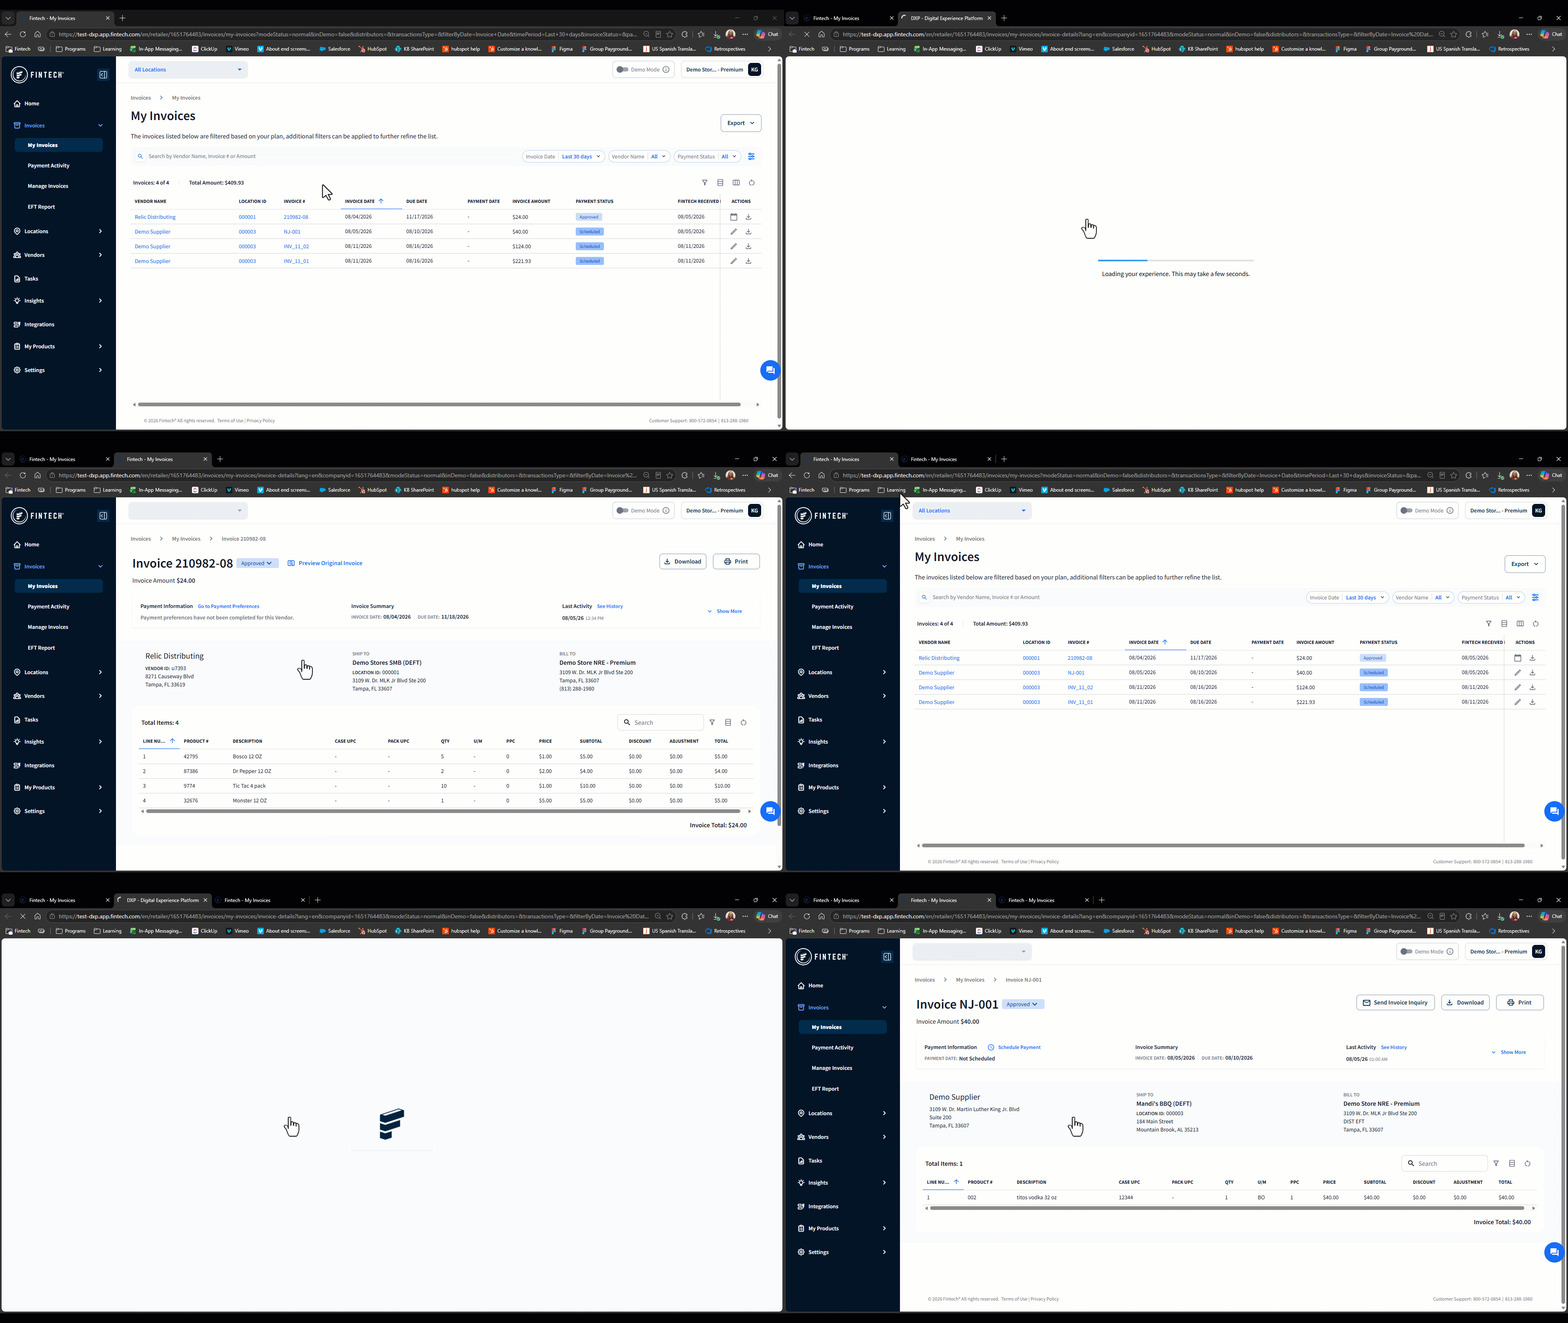
⚠️ Be aware that when selecting an invoice number, you'll have the portal open in two tabs. To avoid confusion, you may want to close the new tab after reviewing the invoice.