In Locations > My Locations, you can:
- Manage your locations and their associated vendors.
- Drill into a location's details (such as contacts for that location, liquor license info, etc.).
- View invoices received by the location, as well as their payment method.
- Add vendors to a location.
The grid provides a snapshot of location information, including name, ID, address, number of vendors, and relationship status:
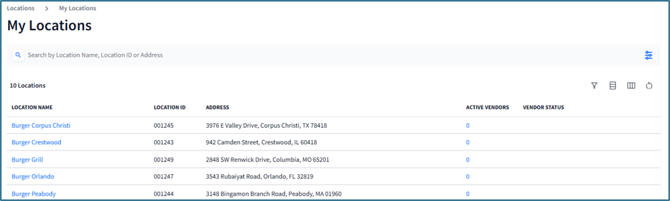
The Vendor Status column groups the total active relationships by status type:
|
Status |
Description |
| Awaiting Vendor Approval | When a vendor needs to approve the requested relationship from a retailer through the Fintech Portal. |
| Awaiting Retailer Confirmation | When a retailer needs to approve a relationship request from a vendor within the portal. |
| Pending Payment Verification |
The retailer's bank is reviewing the vendor's bank account information. This is only applicable if the retailers bank account is using debit or ACH filters. |
| Active Not Processing | When a retailer-vendor relationship has been established but invoices have yet to be sent, reviewed, and paid. |
| Processing | Invoices are successfully being sent by the vendor and the paid through the portal by the retailer. |
| Inactive | The retailer or vendor has requested to stop processing invoices through the portal. |
| Declined | The retailer or vendor has declined to set up a relationship with one another through the portal. |
💡 Regardless of whether the location has received invoices, the status of a vendor remains Active until either the location or the vendor requests a change.
Basic Searching and Filtering
View invoices for all of your locations, or choose to only see a specific location using the location drop-down: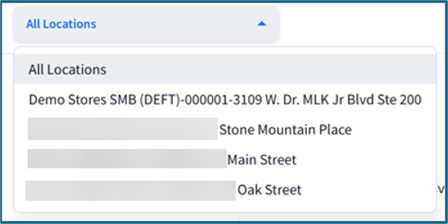
The search and filter options will help find specific payment records based on Location Name, Location ID, Address, and more:

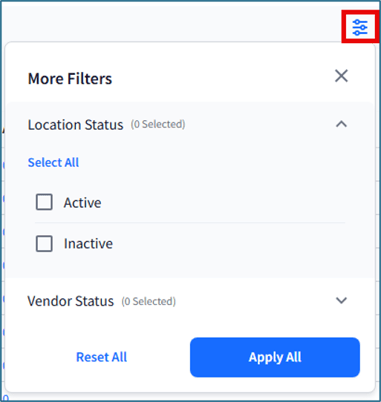
Click the grid filter icon  to apply additional filters across the entire grid, such as Location Status or Vendor Status. To save the selections as the default view, toggle Save as default filter, then click Apply All. To clear these selections, click Reset All:
The Location Name column contains a hyperlink that will open the location's profile:
To return to My Locations from this screen, click the back button in your browser.
For detailed instructions on using more grid controls, see Grid Navigation.
Location Details
Select a row or location name from the grid to see:
- The location’s address, location ID, and liquor license number and type.
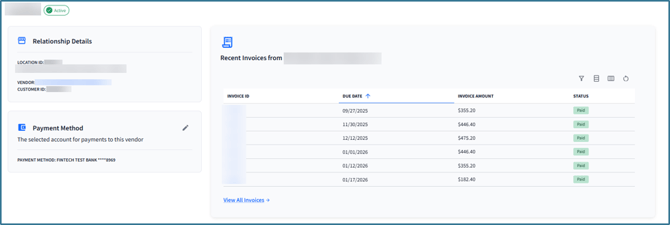
- Current vendor relationships. Click on a vendor tile to view the relationship status, contact information, Vendor Customer ID, the most recent invoices, and payment method.
- Location contacts.
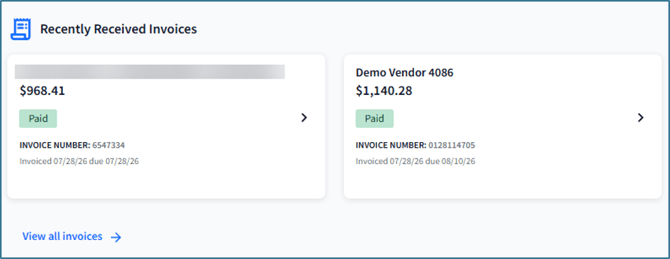
- Last 4 distributor invoices received. Click on one invoice tile or click on View All Invoices. For more information, refer to the following knowledge base section: Invoices.
Managing a Location’s Contacts
To see a location's contacts:
- Go to Locations > My Locations and select a location from the grid.
- On the next page, look for the Company Contacts section. If available, click on the Show More button within the section to view all contacts. If you need to add or update contacts, please contact Client Support for help.
Updating a Location's Address
If you need to change a location's address, please contact Client Support for help.
Vendor Relationships by Location
Viewing a Location's Vendors
To view a location's existing vendor relationships:
- Go to Locations > My Locations, then select a location from the grid.
- Find and click on a vendor tile within the Vendors section.
- Here you can view the Location ID, edit payment settings, and view recent invoices:
💡 If you see a relationship has a Pending status, there are tasks that still need to be completed before the relationship can go live. For more information, see Tasks.
Adding a Vendor to a Location
If you'd like to add a vendor to a location, confirm you've added them as a relationship to your account: How do I add a vendor relationship?
To add a vendor to a location:
- Find and select the location from Locations > My Locations.
- Click on the Add More Vendors button within the Vendors section:
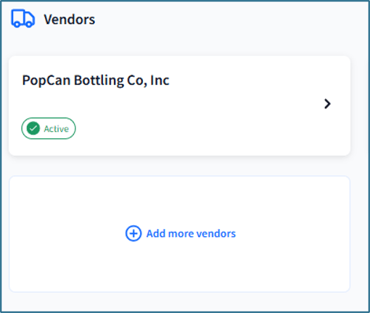
⚠️ If a location has over 4 vendors, you will need to click Show More and load them all before this button will be available.
- Select Explore Vendors to Connect, then search for and select the relationships you are looking to add. For more detailed steps on adding vendors to a location, follow the instructions here: Adding Vendor Relationships.
Invoices by Location
To view a location's invoices:
- Go to Locations > My Locations and select a location from the grid.
- On the next page, find the Recently Received Invoices section to view a summary of the 4 most recent invoices:
- Either:
- Select an invoice to view further details (and download the invoice if you have a subscription).
- Click View all invoices to view all invoices received for the location (navigates to Invoices > My Invoices).